OverTheWire’s Bandit is a beginner-friendly wargame designed to teach Linux basics, command-line navigation, and fundamental security concepts.
I highly recommend it if you’re looking to improve your understanding of file permissions, SSH, environment variables and basic scripting.
In this article, I’ll document my journey through the 34 levels of this challenge.
Level 0.
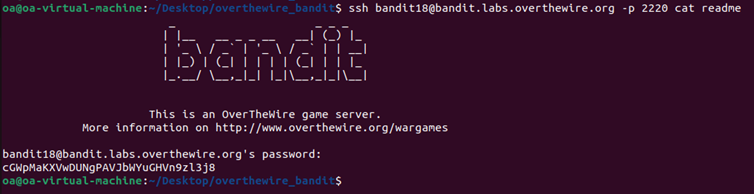
The goal of this level is for you to log into the game using SSH. The host to which you need to connect is bandit.labs.overthewire.org, on port 2220. The username is bandit0 and the password is bandit0.
The ssh command is straightforward to use :
ssh <username>@<remote> -p xxxx With the given credentials :
ssh bandit0@bandit.labs.overthewire.org -p 2220 Level 0→1.
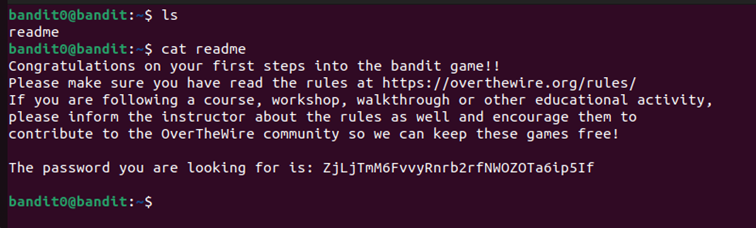
Now that we’ve retrieved the password for level 1, it’s time to switch to the next level. Each level requires you to log in as a different user using the password you just obtained.
To proceed, log out of the current session and start a new SSH session using the next level’s credentials:
exit
ssh bandit1@bandit.labs.overthewire.org -p 2220
Make sure to save each password as you progress, as you’ll sometimes need to backtrack to previous levels to solve more advanced challenges !
Level 1→2.
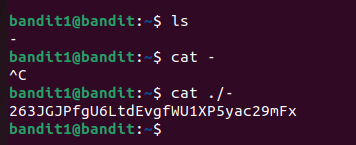
The correct way to open a file with a dash in its name by specifying its explicit path :
cat ./-filename or by prefixing with – to stop option parsing :
cat -- -filename Level 2→3.
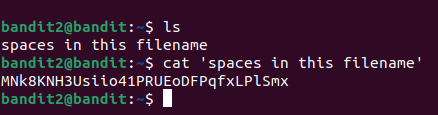
Filenames with spaces can cause issues when using commands, they must be properly handled using quotes :
cat 'spaces in this filename'or espaces characters :
cat spaces\ in\ this\ filenameLevel 3→4.
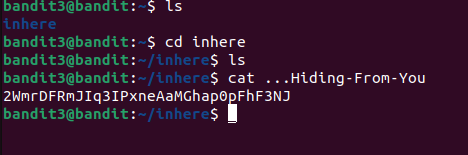
In Unix systems, hidden files names begin with a dot, meaning they don’t show up in a normal ls listing.
Here I used tab completion which automatically completed the filename.
There are more efficient ways to display all files including hidden ones :
ls -a or :
ls -la This one also shows permissions, ownership and file sizes.
Level 4→5.
In this level, we are given multiple files, but only one of them contains human-readable text. Our goal is to identify the right file and extract its content.
file ./-file00 ./-file01 ./-file02 ./-file03 ./-file04 ./-file05 ./-file06 ./-file07 ./-file08 ./-file09This explicitly lists every file and checks its type using file. It’s tedious and inneficient.
Instead of manually listing all files, we can use find to locate all files and apply the file command to each one automatically :
find . -type f -exec file {} +- type f → only look for regular files (ignore directories).
- exec file {} + → Run file on each file found.
You could also use brace expension to list the filenames more concisely :
file ./-file0{1,2,3,4,5,6,7,8,9}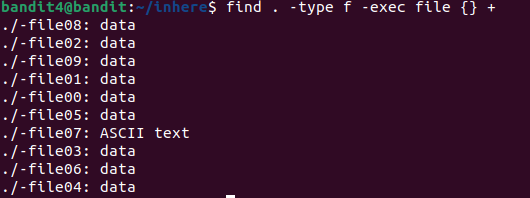
We can deduce that it must be file07. Let’s check :

And it does look like a password. On to the next level !
Level 5→6.
The password for this level is hidden somewhere inside a directory. In order to find it, the file must be human-readable, exactly 1033 bytes in size and not executable.
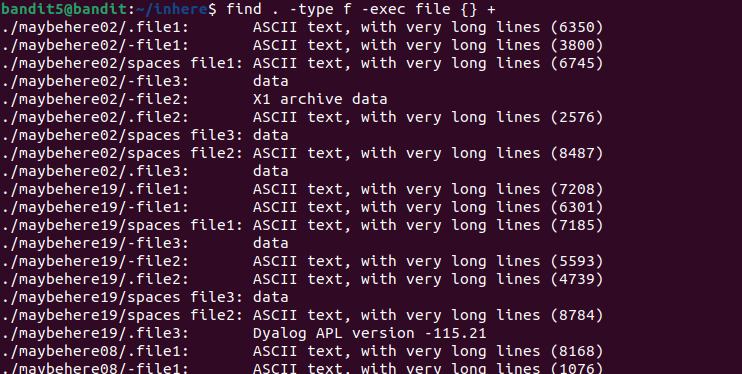
I firstly came up with this listing but it’s too long and unreadable so we must filter it further by specifying the file size :

Much better !
Level 6→7.
The next password is hidden somewhere on the server. To locate this file, it must be owned by bandit7, be owned by group bandit6 and have a size of exactly 33 bytes.
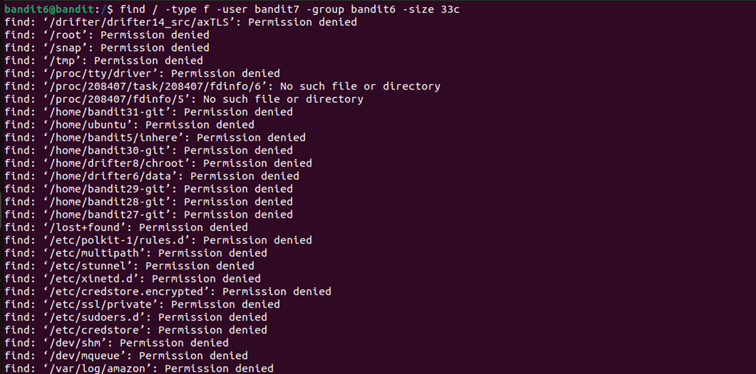
The output is cluttered with ‘Permission denied’ and ‘No such file or directory’ messages making it hard to spot the correct file.
To remove these unnecessary messages and only display relevant results I used grep :

And here’s the password !
Level 7→8.
In this one, we have to find the password located in a text file next to the word ‘millionth’.
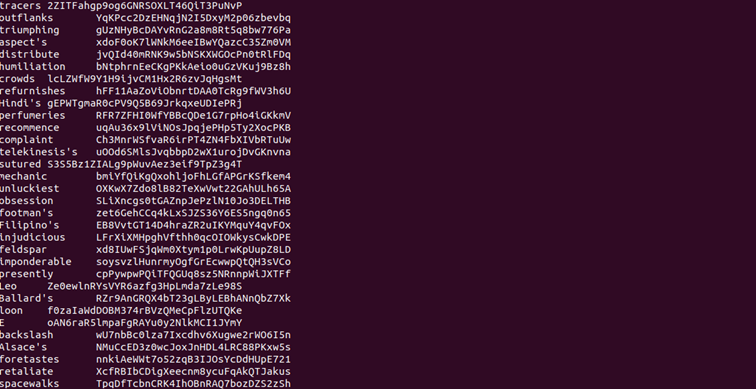
It’s a really long file, so again we must filter these lines using grep :

Level 8→9.
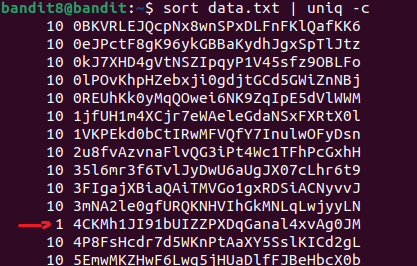
The password is the only line that appears exactly once in the file.
In order to do that we must use a combination of sort and uniq.
Since uniq only works on sorted input, we must first sort the file before filtering unique lines :
Sort the file to group identical lines together :
sort data.txtRemove duplicates :
uniq -u
Alternative approach by counting occurences :
Level 9→10.
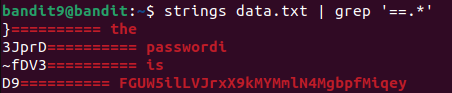
In this level, the password is hidden as one of the few human-readable strings and it is preceded by multiple ‘=’ characters.
Since the file contains a mix of binary and text data we need to extract human-readable strings first.
We can use strings which filters out non-printable characters, and then search for lines containing ‘=’ with grep :
strings data.txt | grep '==.*'The command quickly reveals the password :
Level 10→11.
The solution to this level is quite straightforward, as you only need to decode the base-64 encoded content of the file to retrieve the password.
You can do this using base64 :
base64 -d data.txtLevel 11→12.
This one is a little bit more tricky, as it refers to the ROT13 cipher, a simple substitution cipher that shifts letters by 13 places.
A mapping of the cipher would look like this :
| Original | Shifted (ROT13) |
|---|---|
| a → n | n → a |
| b → o | o → b |
| c → p | p → c |
| … | … |
| m → z | z → m |
This indicated that we will need to use the tr command :
cat data.txt | tr 'a-z' 'n-za-m' | tr 'A-Z' 'N-ZA-M'Breakdown :
-
‘a-z’ / ‘A-Z’ respectively represents all lowercase/uppercase letters in order (you could also use [:lower:] and [:upper:]).
-
’n-za-m’ / ‘N-ZA-M’ represents the same letters but shifted by 13 places → the letters a-m move forward by 13 places and the letters n-z wrap around back to the beginning.
Level 12→13.
Unlike previous levels, you’ll need to create a directory since you will manipulate a few files.
The mktemp -d command is used to create a temporary directory with a unique, hard-to-guess name, ensuring that other users on the system cannot easily find or interfere with it. This is useful when working with sensitive files, like the
compressed hexdump in this level.
This will return a unique directory path, for example :
/tmp/tmp.XYZ123Once the temporary directory is created, copy the data.txt file into it using cp :
cp data.txt /tmp/tmp.XYZ123You can now head to the temp directory and rename the file we just copied using mv :
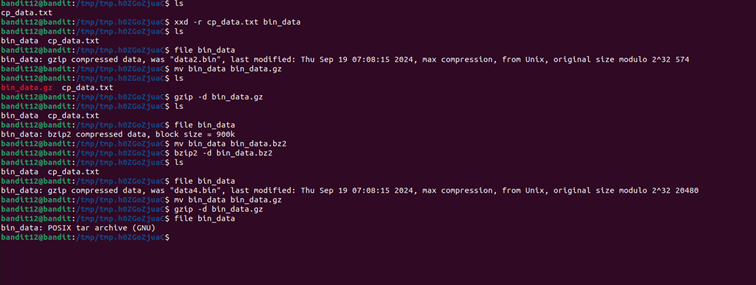
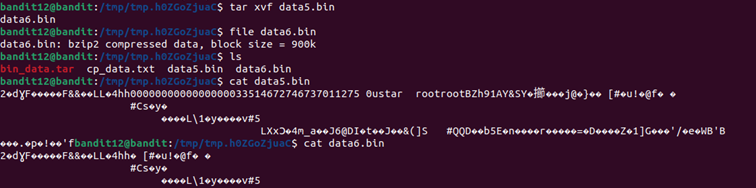
mv data.txt copy_data.txtThe original given file was not a standard compressed file but instead a hex dump.
A hex dump is a text-based representation of binary data, where each byte is shown as two hexadecimal digits. While it’s useful for inspecting raw data, a hex dump is not directly executable or decompressible, so we cannot simply use tar, gzip, or bzip2 on the hex dump. These tools expect binary files, not text representations.
The proper way to revert a hex dump to its original binary format is using :
xxd -r data.txt bin_dataYou then need to go through 7 steps of decompressing :
- Extracting a .gzip archive
- Extracting a .bzip2 file nested inside
- Handling another .gzip compressed file
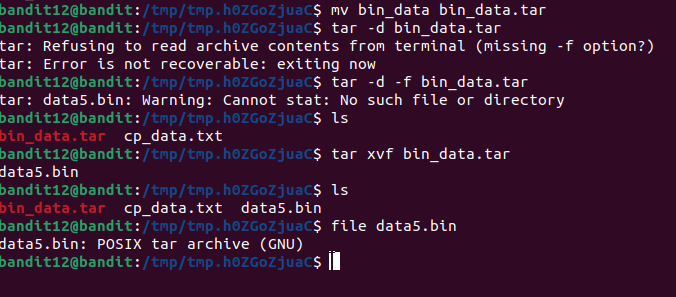
- Extracting a .tar compressed file
- Another .bzip2 compression
- Yet another .tar archive
- Finally, extracting the password from the last decoded gzip file
Each step required checking the file type using the file command and applying the correct decompression method.
Note that some compression tools expect a specific file extension.
For example, I’m pretty sure gzip expects files to end with .gz or the command won’t work, so you’ll sometimes need to rename your files with mv.
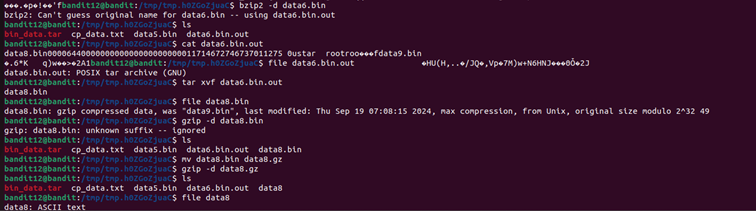

This level is easy but almost drove me to madness due to the sheer number of nested extractions required to retrieve the password.
Level 13→14.
After logging into level 13, you can find a private SSH key file in the home directory, which means we’ll need to use ssh key-based authentification instead of the usual password login :
ssh -i sshkey.private bandit14@bandit.labs.overthewire.org -p 2220After connecting as bandit14, you are now able to read the password from the indicated location :
cat /etc/bandit_pass/bandit14This challenge introduces SSH key-based authentication, where a private key file replaces password login.
The -i flag tells SSH to use a specific identity file (the private key) for authentication. In practice, SSH keys work as a pair - the private key (must be kept secret by the owner) and public key (stored on servers). When connecting, your SSH client uses your private key to sign a “challenge”. Then the server verifies this signature using the corresponding public key and if verified, you’re authenticated without needing a password. This method is both more secure and convenient than password authentication, as it eliminates the risks of password transmission and brute force attacks.
Level 14→15.
The goal of this level is to find the password for the next level using the 3000 port on localhost. In order to interact with an open port, we can use netcat, which allows us to send and receive raw data over a network connection :
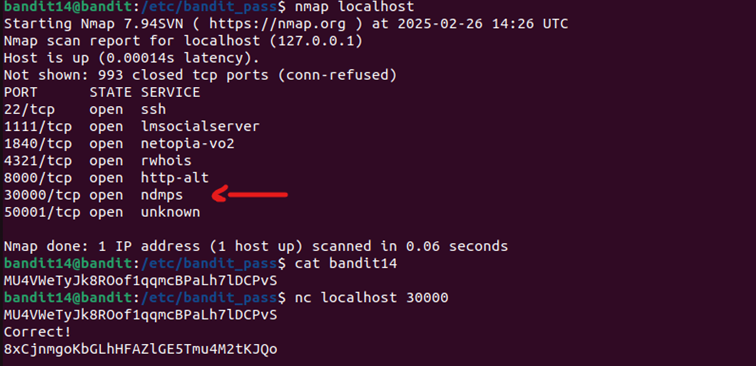
(quick display of nmap, used to show which ports are open on localhost).
Level 15→16.
For this level, you need to establish a SSL connection to the server on port 30001 using openssl and s_client :
openssl s_client -connect localhost:30001After the connection is established, you can enter the current level’s password, the server will answer with the password for next level.
This challenge introduces secure connections using SSL/TLS protocols.
The openssl s_client command functions as an SSL/TLS client, allowing encrypted communication with servers.
Unlike regular unencrypted connections (like telnet or netcat), OpenSSL establishes a secure channel where data is encrypted before transmission. This prevents anyone monitoring network traffic from seeing sensitive information like passwords.
Level 16→17.
Firstly, we need to find which port between 31000-32000 had a server speaking SSL, then submit the current password to receive the SSH private key for the next level.
This indicates us we have to us netcat :
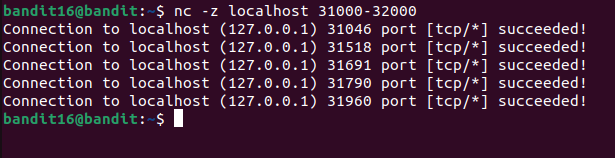
You now have to test each port with openssl, many won’t work or just echo back your input, but port 31790 returns something different :
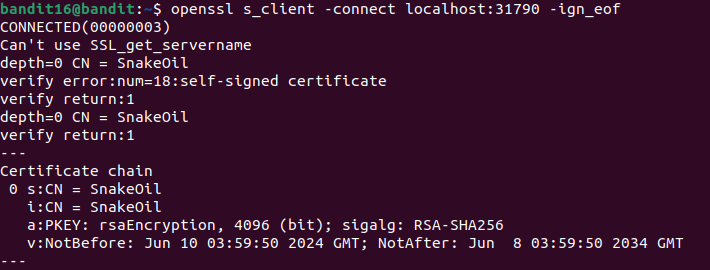

(N.B. : the -ign_eof flag is crucial for this challenge as it prevents OpenSSL from closing the connection after sending data. Without this flag, the connection would close immediately after submitting the password (considered EOF, End-Of-File), not giving us time to receive the server’s complete response).
After connecting to port 31790, I sent the current level’s password and received an RSA private key in return.
I saved this private key locally and used it to access level 17.
Level 17→18.
Initially, my connection to bandit17 was rejected because the private key file permissions were too open :
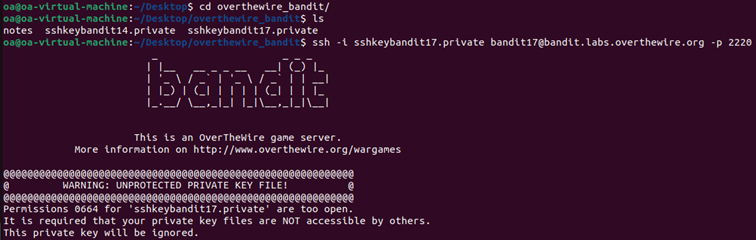
SSH requires private keys to be protected, so you have to fix this using chmod to set proper permissions(readable only by the owner) :
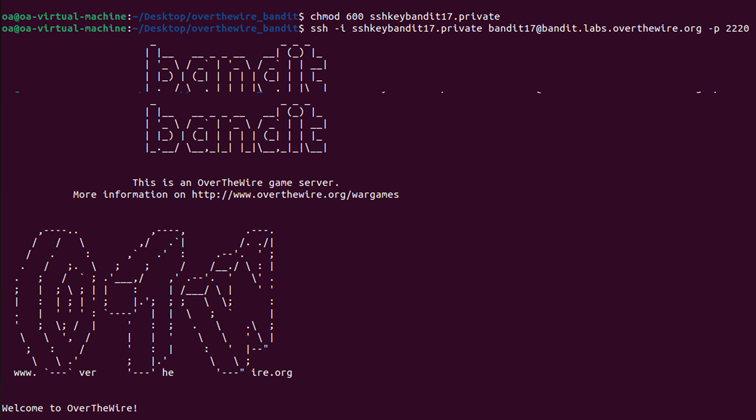
After connecting to bandit17, I found two files :
passwords.old and
passwords.new.
I used diff to compare these files and identify the changes :
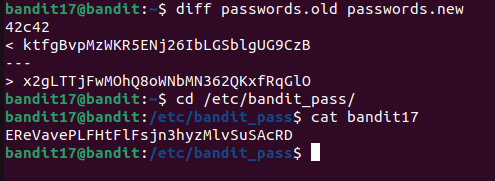
The output shows that line 42 is different in both files.
The string in
passwords.new is the password for next level (the second one).
As you can see, I also retrieved bandit17 password using what we learnt in
level 14, since we only connected to bandit17 using its private SSH key, it could eventually be useful later.
Level 18→19.
Since the .bashrc file prevents us from maintaining an interactive session, I executed the command directly during the SSH connection :
This approach works because SSH allows executing commands directly on the remote server.
Level 19→20.
After logging into level 19, you can find a binary named bandit20-do in the home directory :

As suggested, running the binary with the id command confirms that while running as bandit19, the binary executes commands with the effective user ID (euid) of bandit20. With this knowledge, I used the binary to read the password file for level 20, which is only accessible to the bandit20 user.
This level demonstrates the concept of setuid binaries, which allow users to execute programs with the permissions of the file owner rather than the current user.
These can be both useful for legitimate purposes (like in this challenge) and potentially dangerous from a security perspective if not properly controlled.
Level 20→21.
For this level, we need to use the binary suconnect that connects to a given port. If it receives the current level’s password, it returns the password for the next level.
First, we need to set up tmux to manage multiple terminal sessions on the server :
tmux new-session -d -s lvl20
tmux attach -t lvl20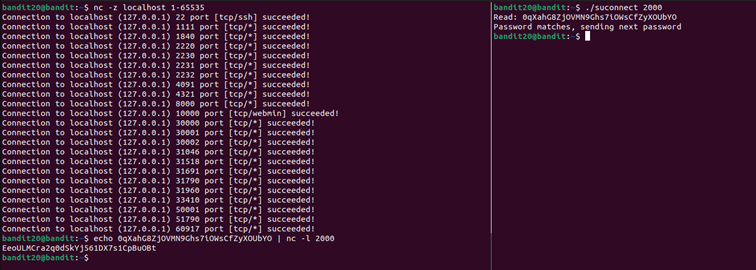
Then I check up which ports are free using netcat (the port range 1-65535 represents all available TCP/IP ports on a system) and set up a listener on port 2000 that serves the current password. Meanwhile in another pane, I connected the suconnect binary to this port. The program verified the password and responded with the next level password.
Setting up tmux was crucial because we needed to run two commands simultaneously on the same SSH session. Without tmux, opening a second SSH connection would create a separate session environment where the netcat listener wouldn’t be accessible to the first session.
Here are some useful tmux keybinds :
- Ctrl + B + O : switch between panes
- Ctrl + B + " : divide pane vertically
- Ctrl + B + % : divide pane horizontally
(see more)
Level 21→22.
(switched to Kali which explains the slight changes in terminal looks)
You first need to look into the cron jobs by examining the system-wide cron directory :
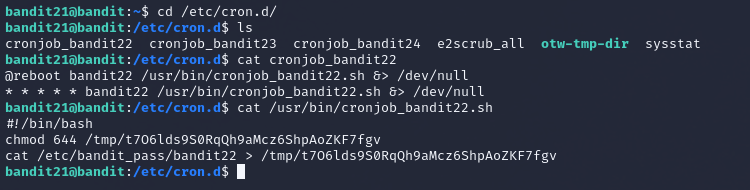
It contains a cron job related to bandit22 and after examining its configuration, it shows that a script runs every minute
'* * * * *' and at system reboot
'@reboot'.
The script in question sets permissions
644 (readable by everyone) on a file in /tmp and copies the password for next level into that file. Now you simply need to read the indicated file to get the password.